
After the AI translation is generated, you can begin the review and editing process. To ensure the translation is accurate, always have a speaker of the language review and make any necessary updates before activating the language.
Note: The reviewing and editing process can be done by an assigned Locale Manager or a Superadmin as long as they speak the language. See the article titled “Locale Manager Administration“ to further understand their role in the translation process.
To Review and Edit Language Translations:
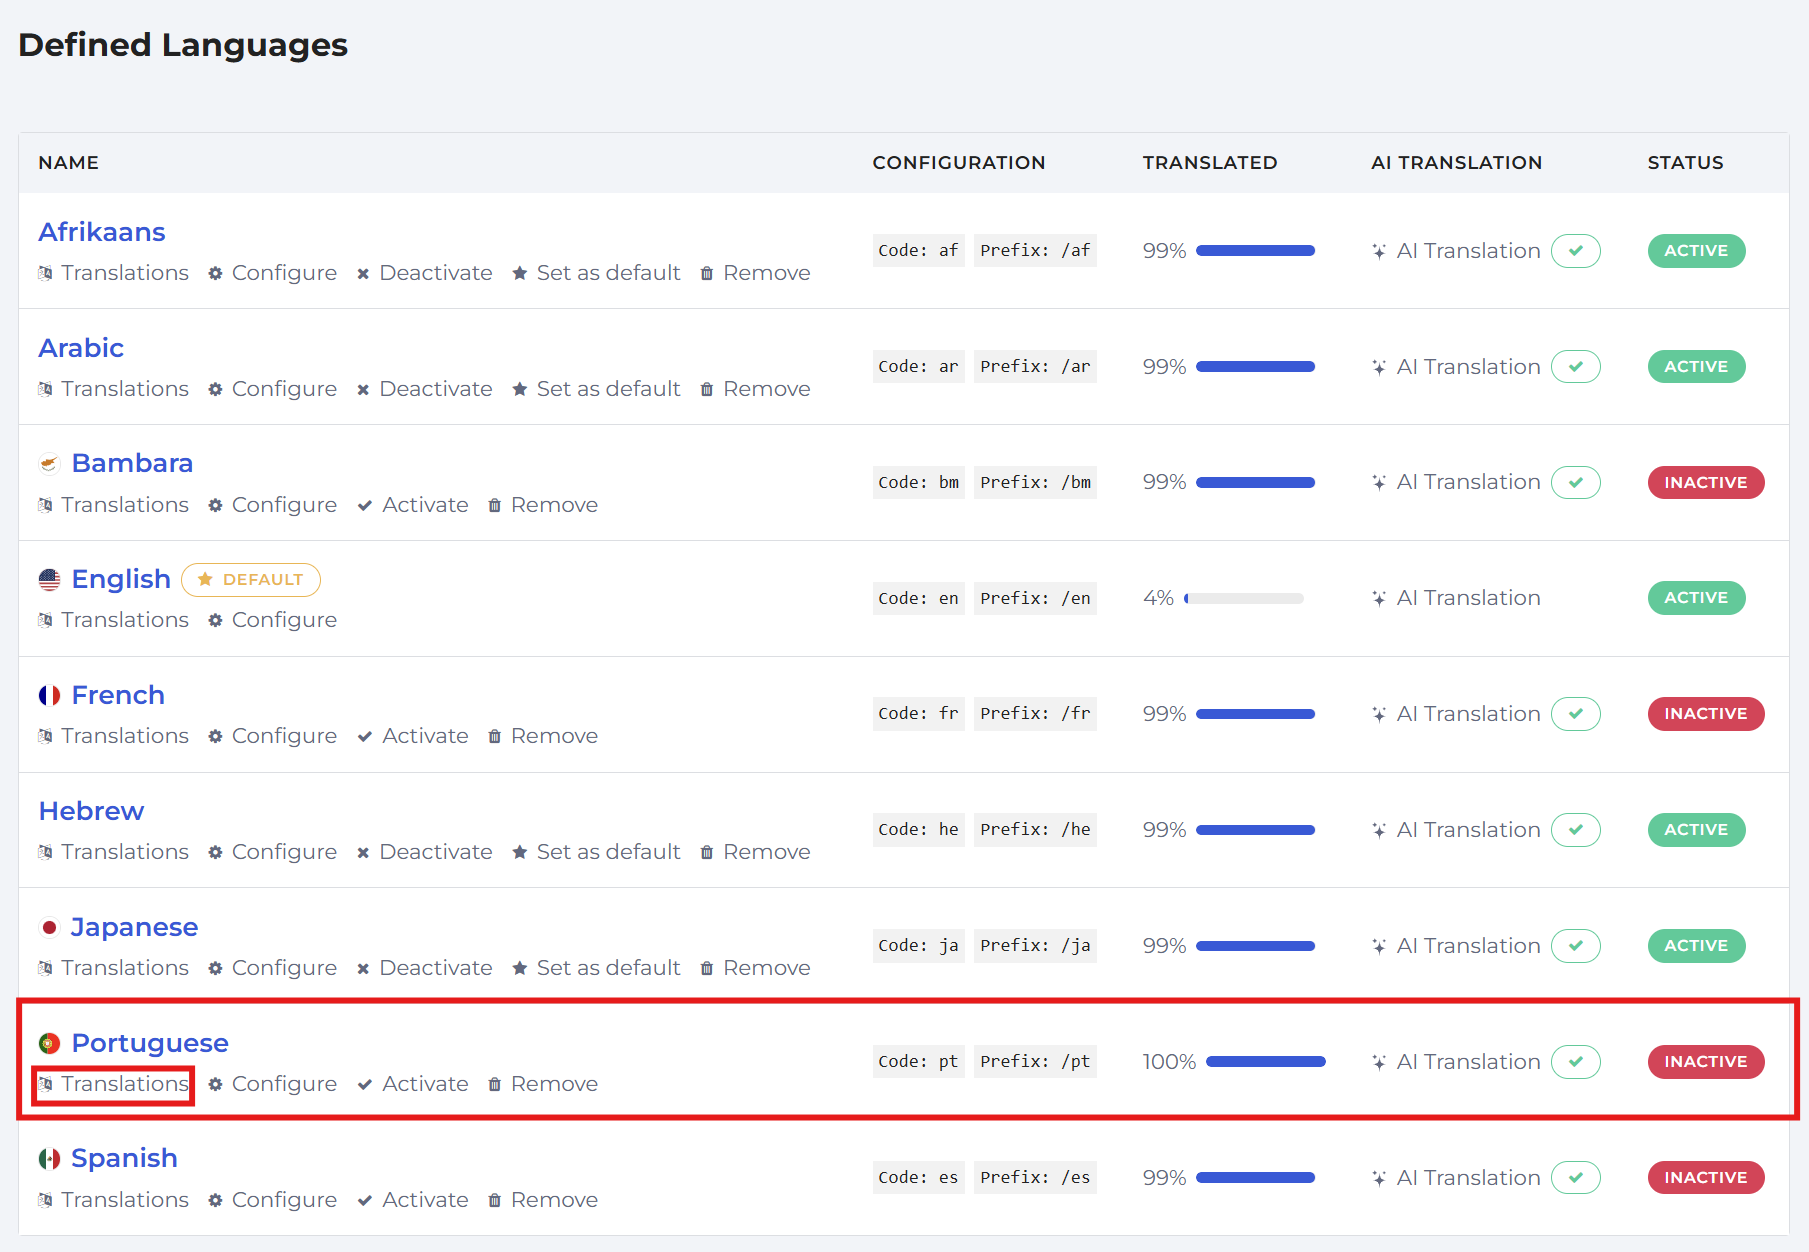
1. Click the translation button beneath the language on the Language list page.
2. On the Translate System page, you’ll see the original English text displayed alongside the AI-translated text for easy comparison. Each translation box can be edited by the reviewer. Review the AI translation carefully and make any necessary changes directly in the translation box. When you’re satisfied with the translation, click the green checkmark below the box to confirm it has been reviewed. Once you click the checkmark it will disappear, showing that the translation has been reviewed and approved by someone who can speak the language.
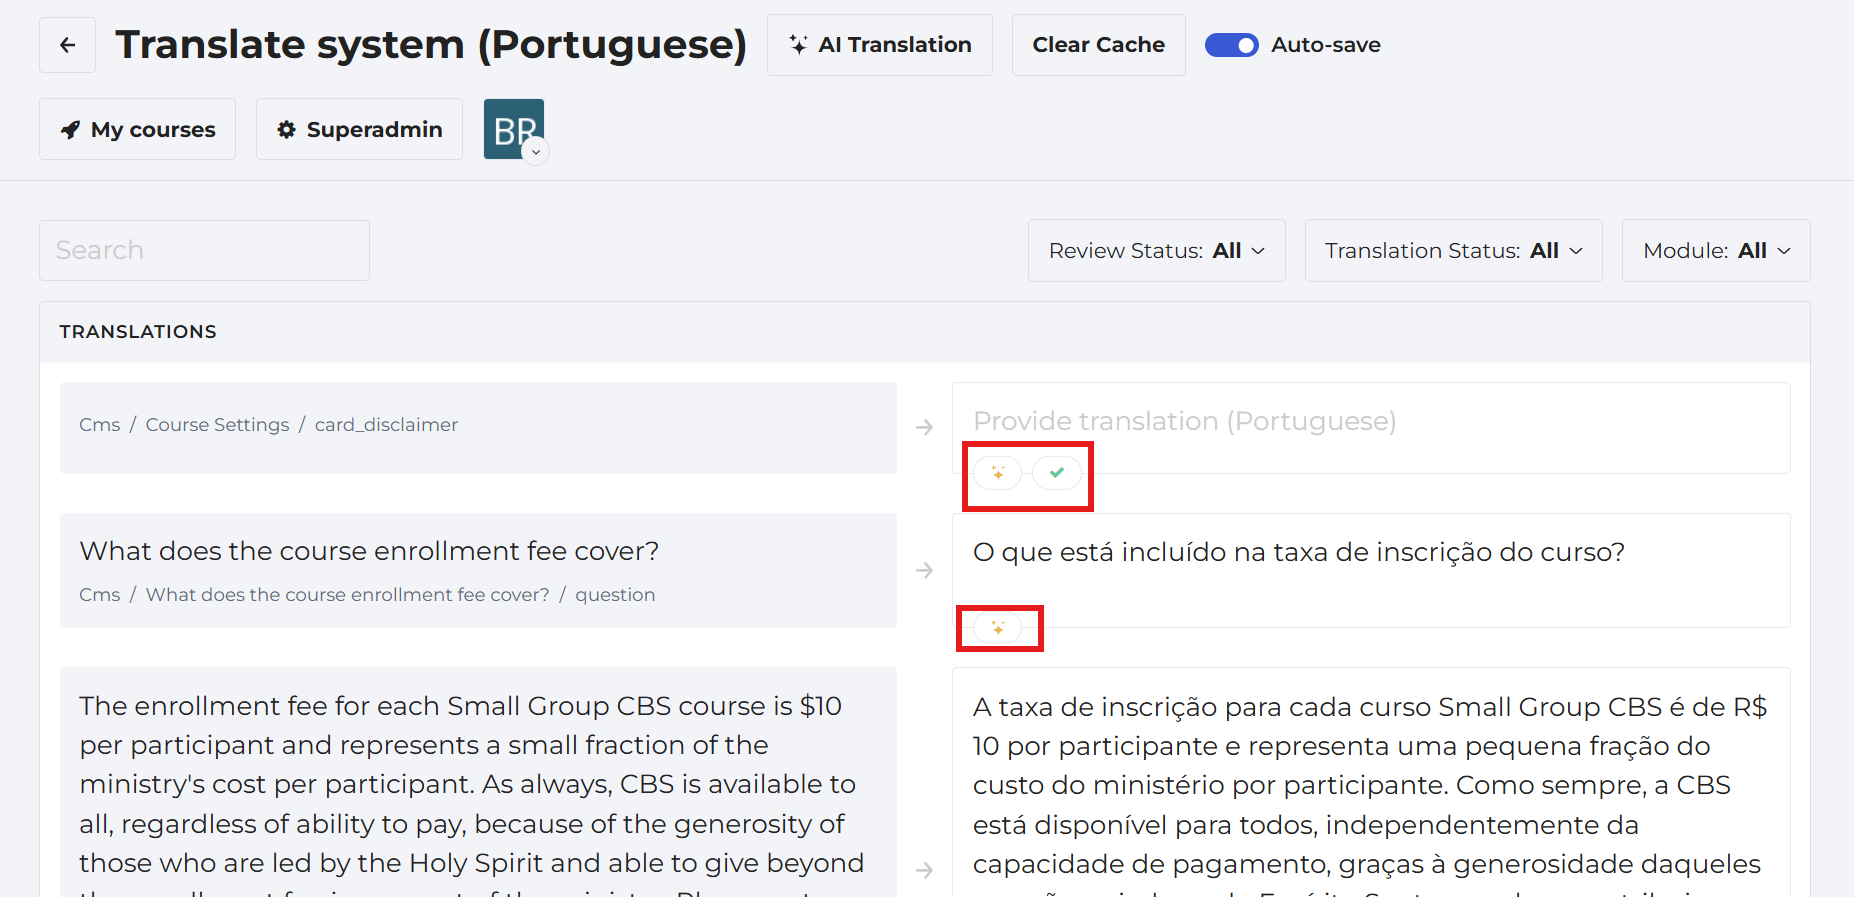
Note: The yellow stars indicate that the text is an AI-generated translation.
3. Use the filters on the right side of the Translate System page to quickly find the content you want to work on. The filters make it easy to find previously translated items and resume your work at any time.
Some words or phrases may not be translated automatically by AI. When this happens, you can use the Manage Glossary feature to enter the translation manually. This helps ensure key terms are translated correctly and consistently throughout the system.
To Use the “Manage Glossary” Feature:
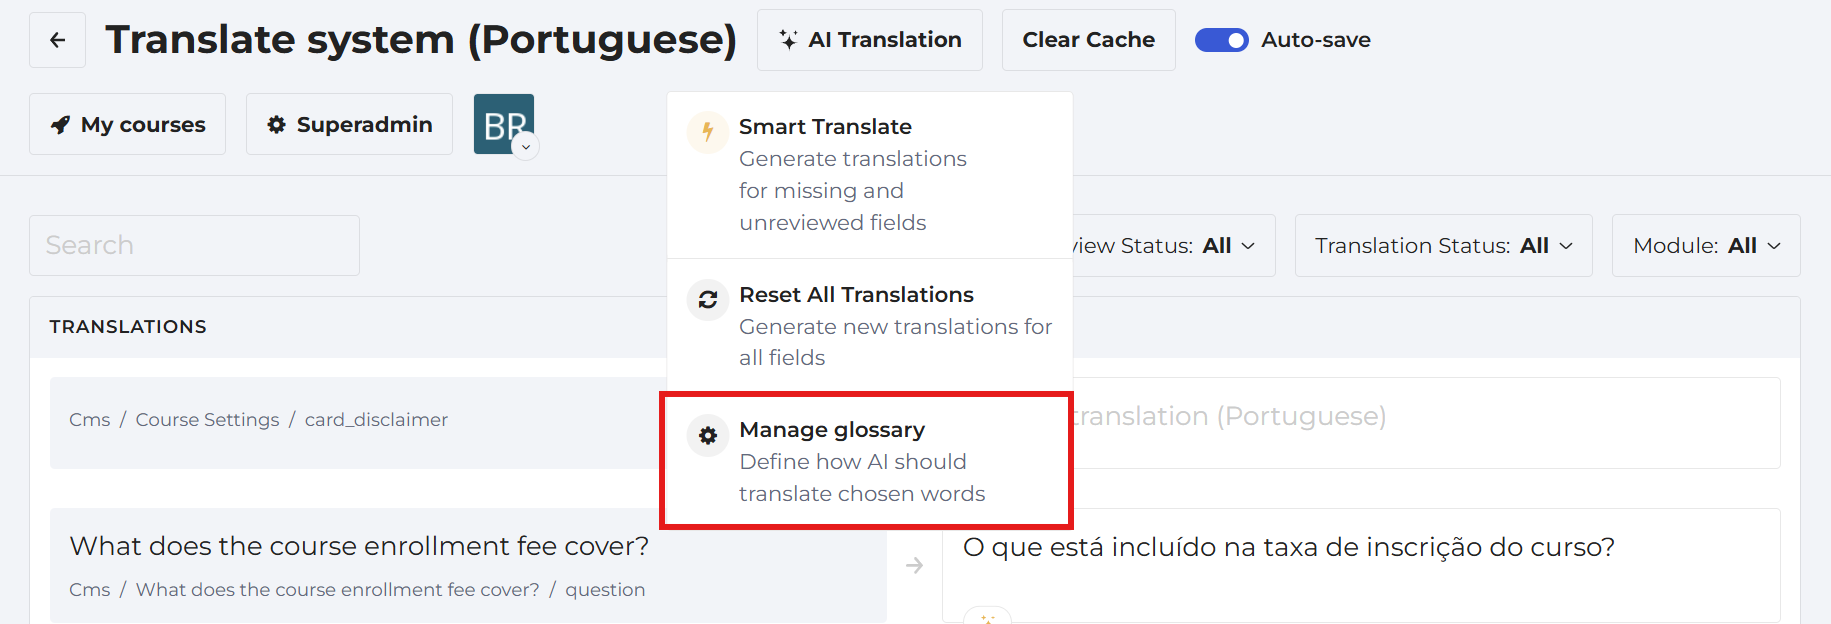
1. Click on the AI Translation button and choose the Manage Glossary box in the dropdown menu.
2. Enter the preferred translation. You can add new terms whenever it is needed.
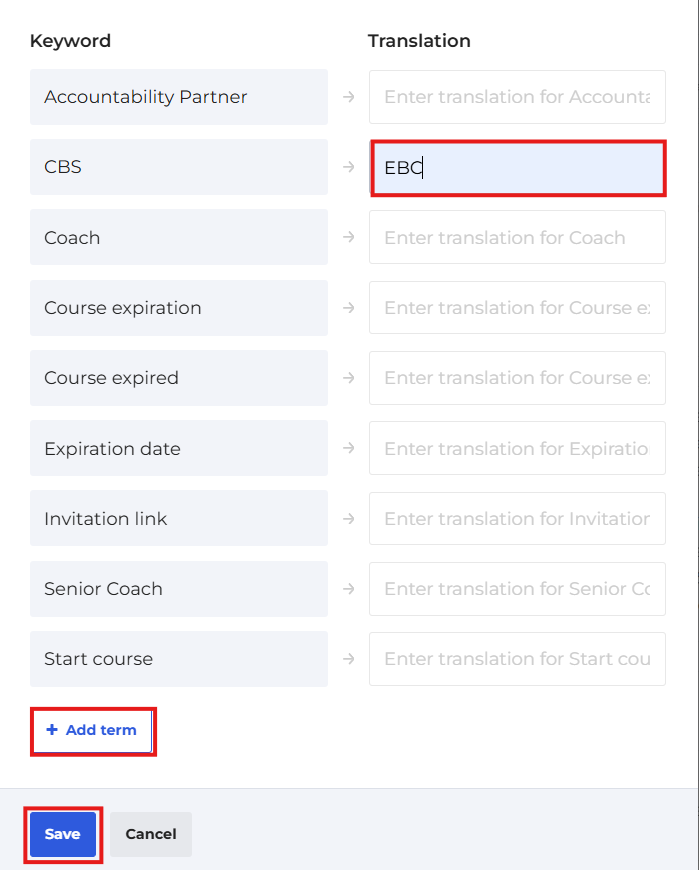 Note: Don’t forget to save your translations.
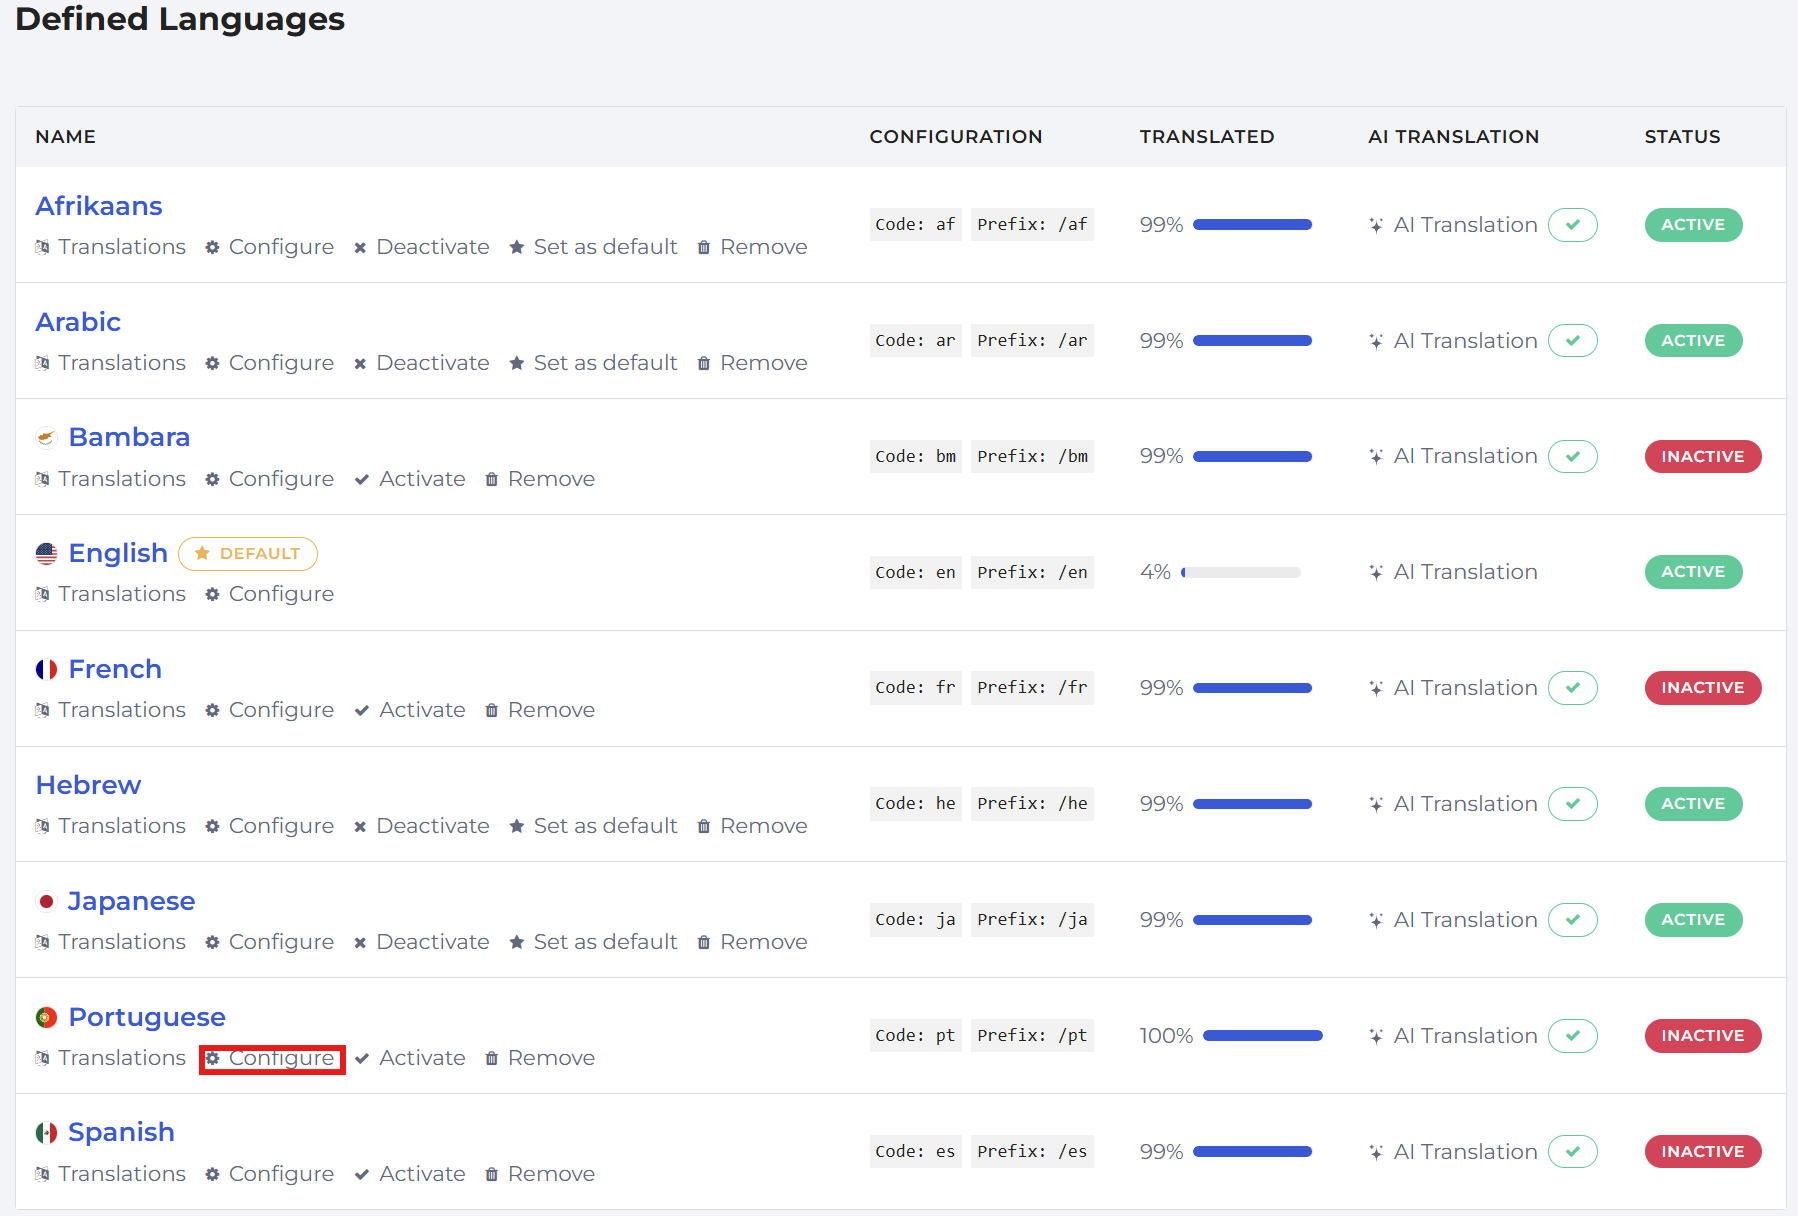
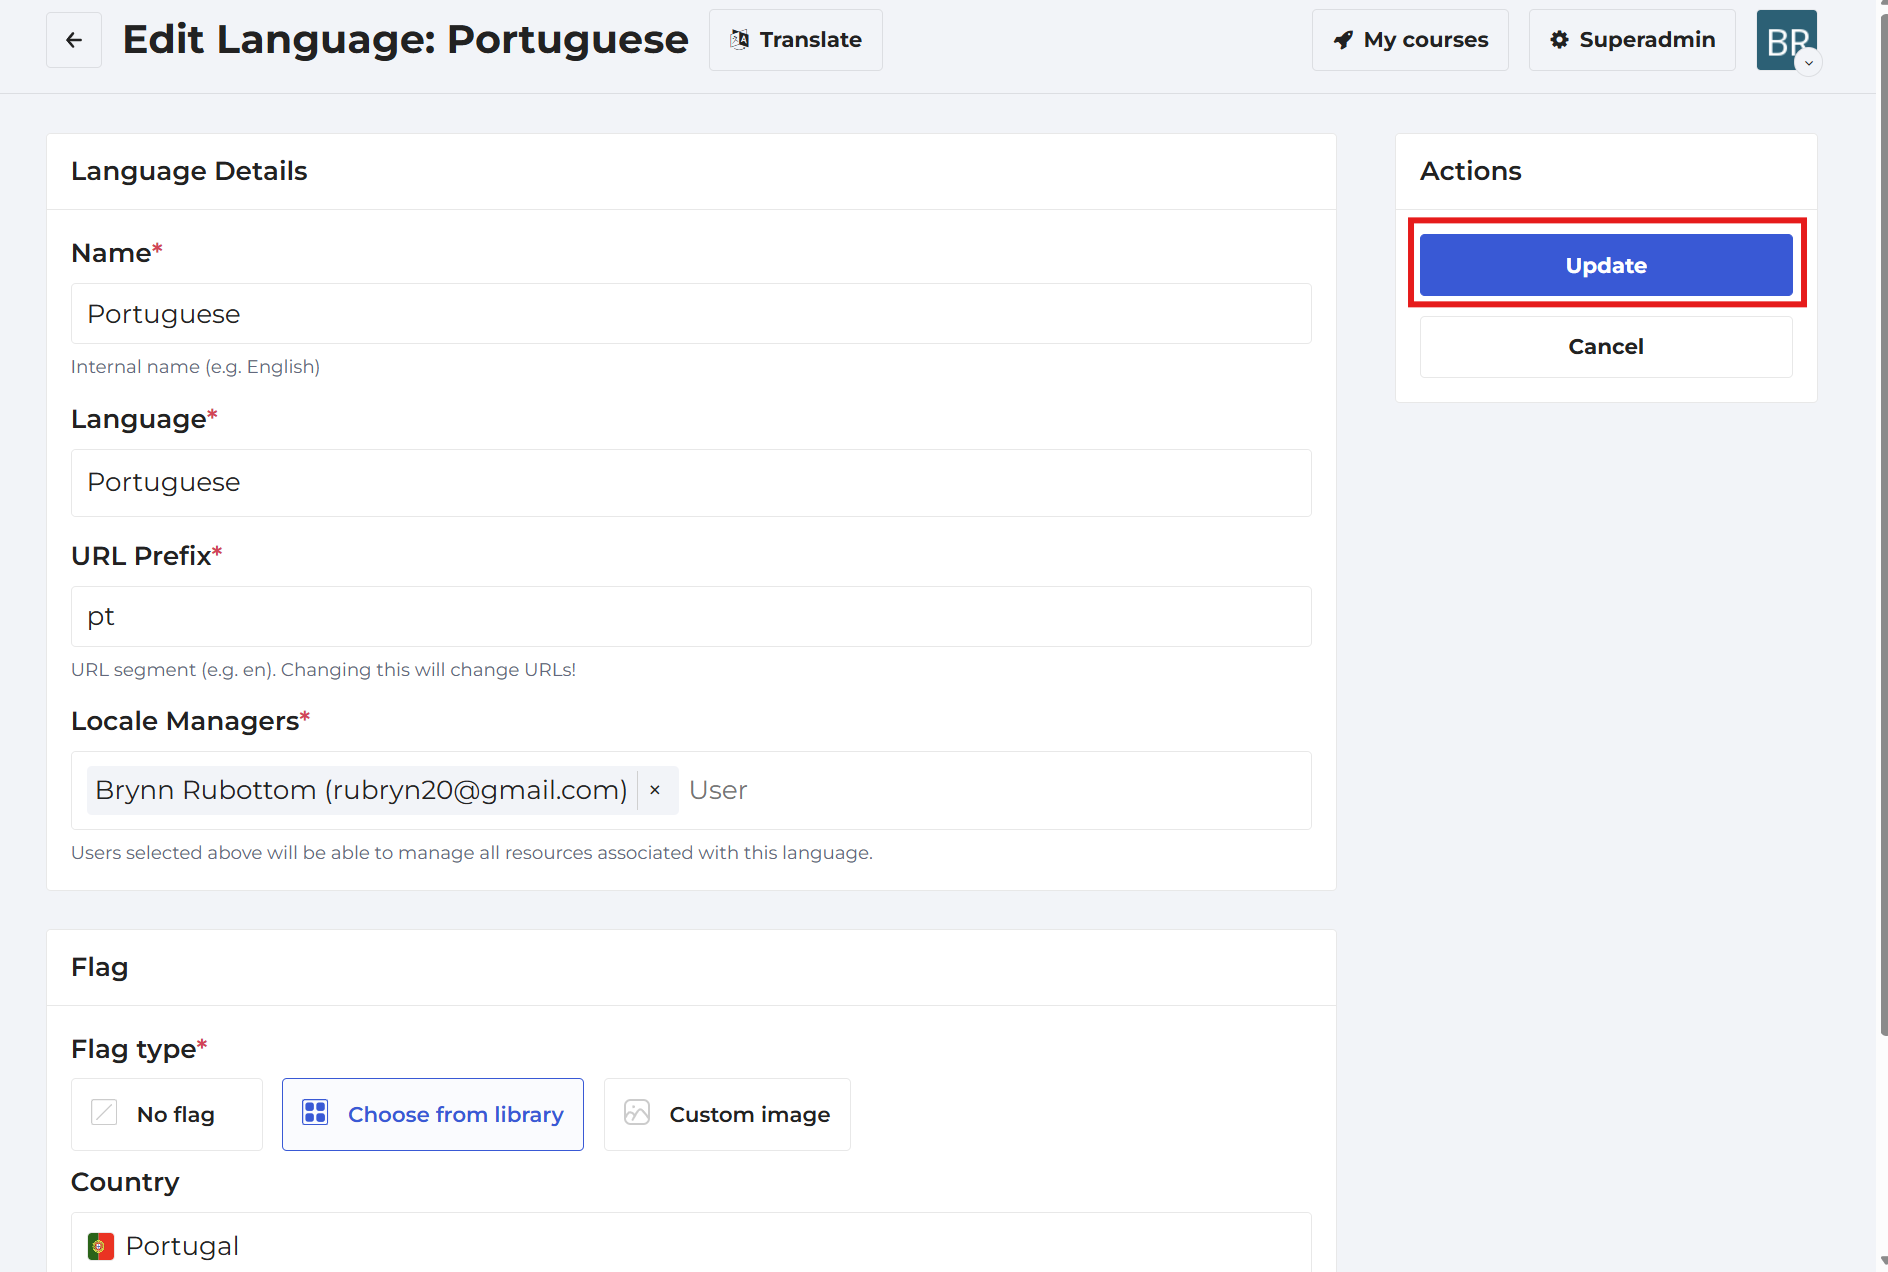
You may notice an error in the language details, such as a misspelled language name or an incorrect flag. You may also want to add additional locale managers after the language has been added. To update a language’s details, use the Configure option for that language.
To Configure Language Details:
1. Go to the Language list page, locate the language you want to edit, and click the Configure button beneath the language.
2. This will take you to the Edit Language page, where you can update the language details. When you have finished making your changes, click the blue Update button to save them.
 Note: You can use the Configure option at any point to make updates even after the language has been activated.