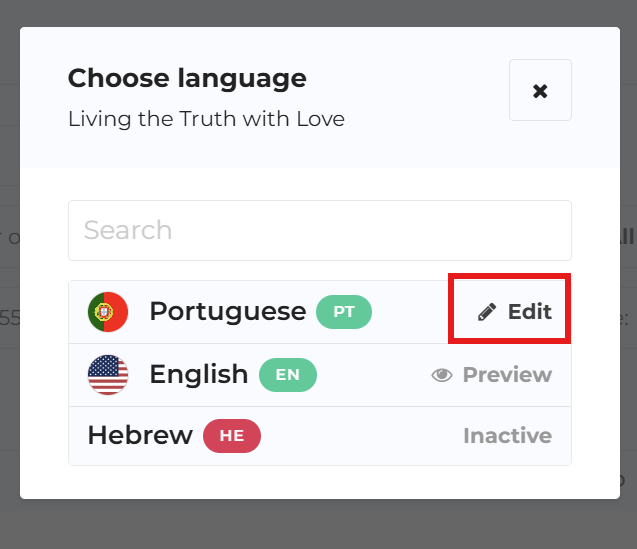
A Locale Manager can generate, review, and edit translations for the languages assigned to them by the platform’s Superadmin. A Locale Manager can also view the course list and make limited edits to the homepage of courses or articles in the language versions they are assigned to.
To Manage the Translation of a Language:
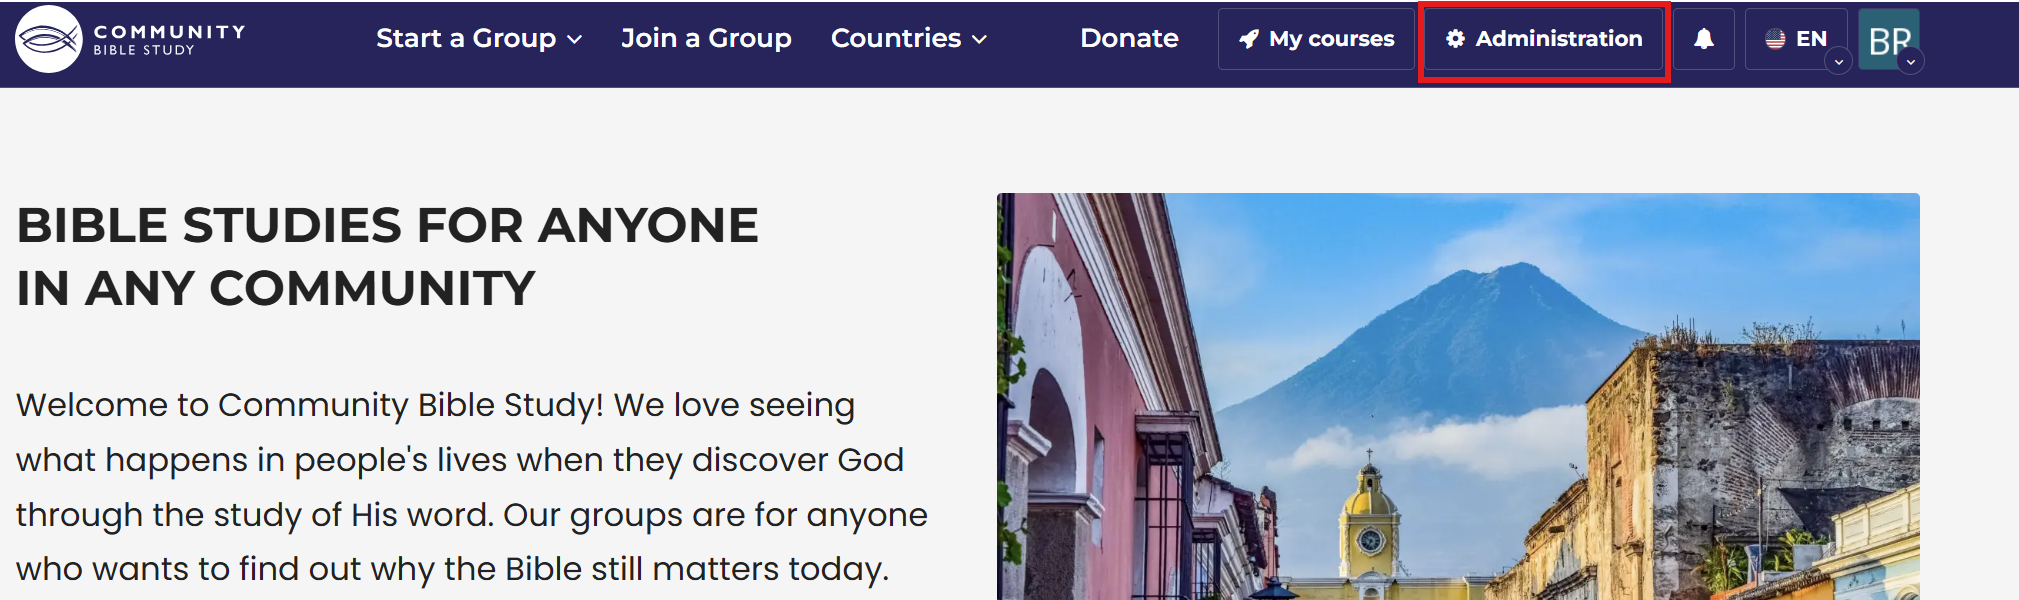
1. Click the Administration button on the top menu bar of your homepage.
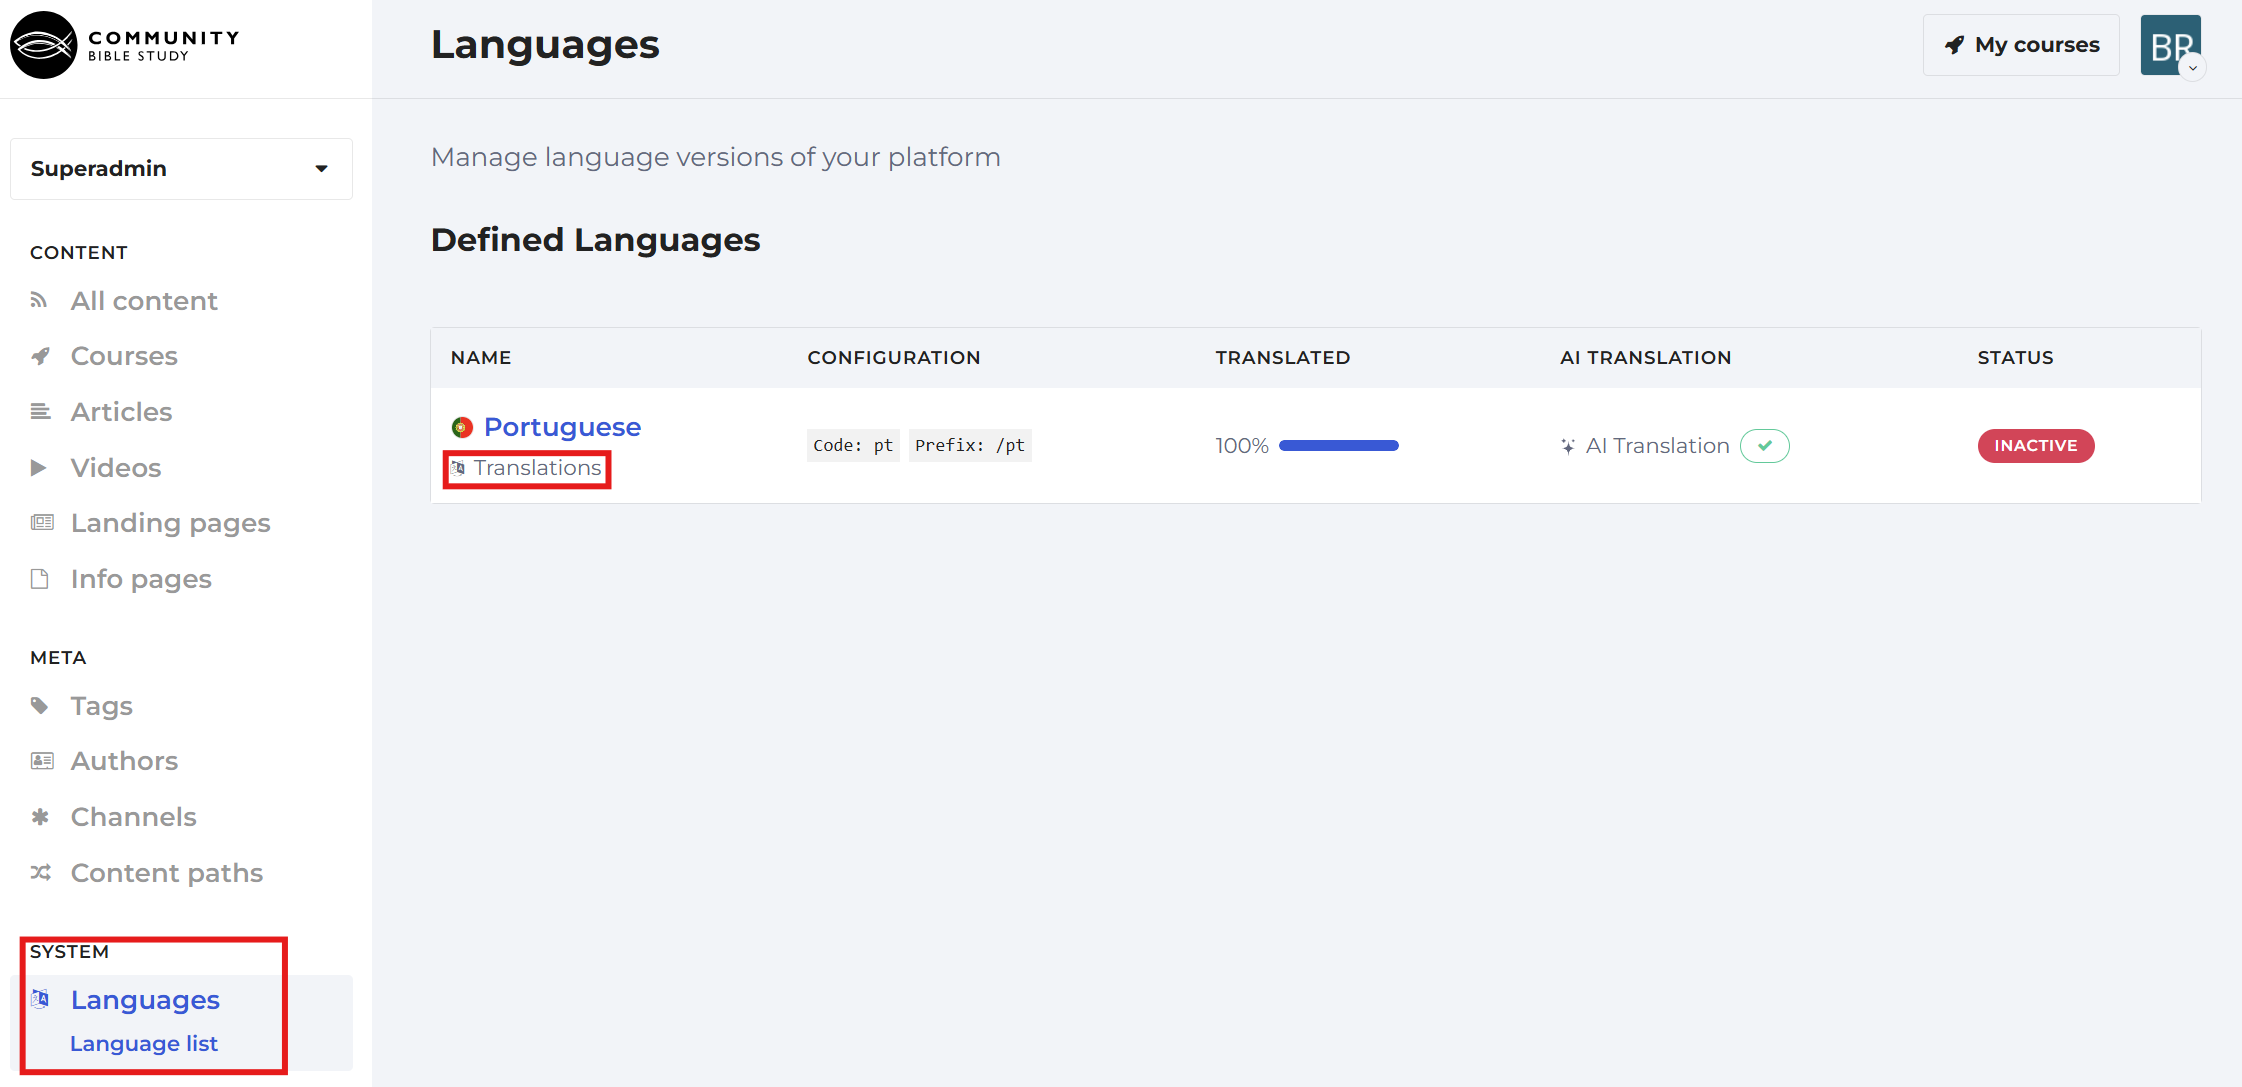
2. On the left-hand menu bar, click the Language list option underneath Languages. You will see the language you have been assigned to edit. Click on the Translations option underneath the language.
3. On the Translate System page, you’ll see the original English text displayed alongside the AI-translated text for easy comparison. Each translation box can be edited by the reviewer. Review the AI translation carefully and make any necessary changes directly in the translation box. When you’re satisfied with the translation, click the green checkmark below the box to confirm it has been reviewed. Once you click the checkmark it will disappear, showing that the translation has been reviewed and approved by someone who can speak the language.
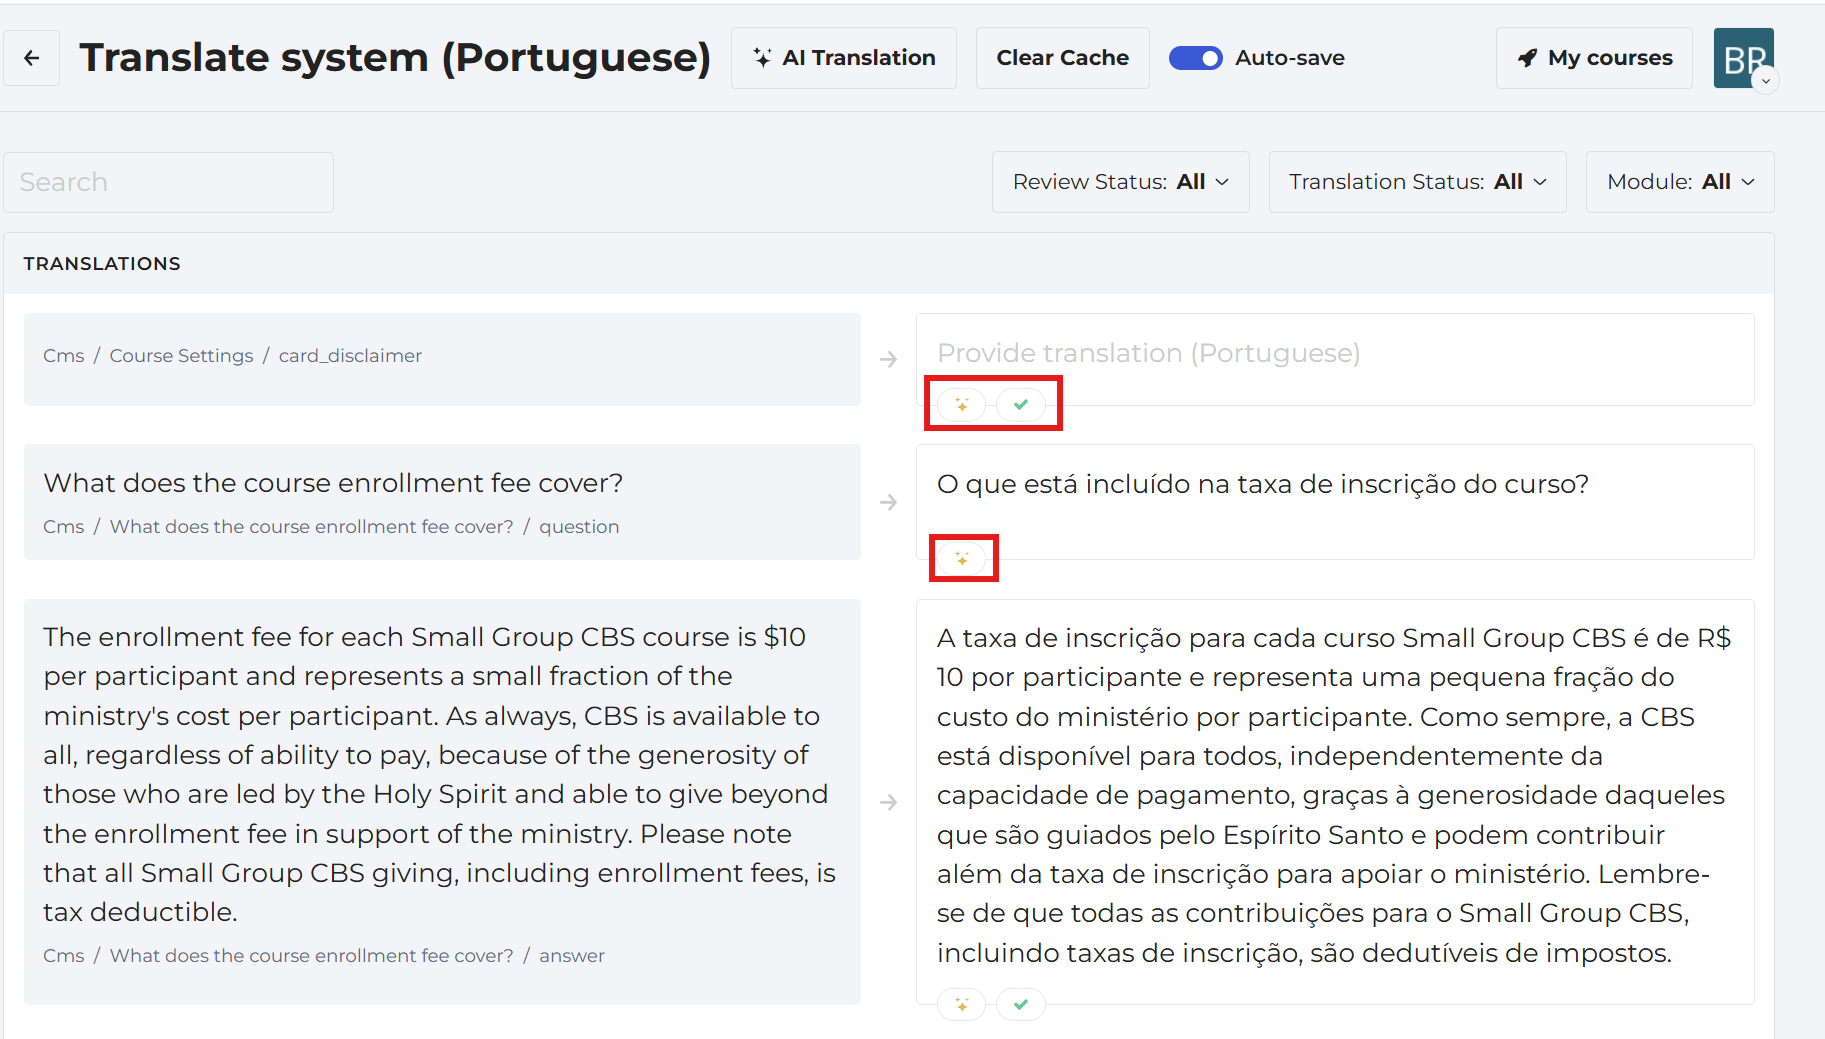
Note: The yellow stars indicate that the text is an AI-generated translation.
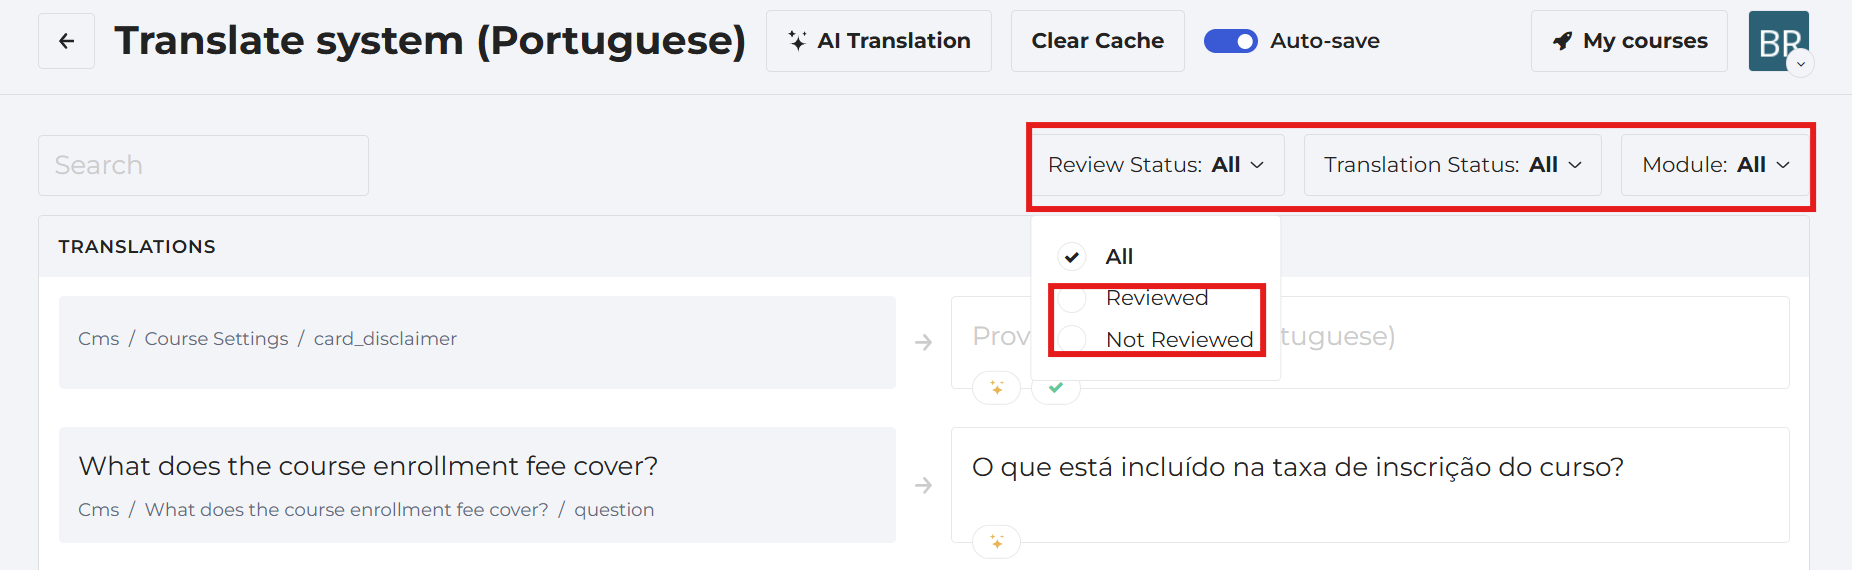
4. Use the filters on the right side of the Translate System page to quickly find the content you want to work on. The filters make it easy to find previously translated items and resume your work at any time.
Some words or phrases may not be translated automatically by AI. When this happens, you can use the Manage Glossary feature to enter the translation manually. This helps ensure key terms are translated correctly and consistently throughout the system.
To Use the “Manage Glossary” Feature:
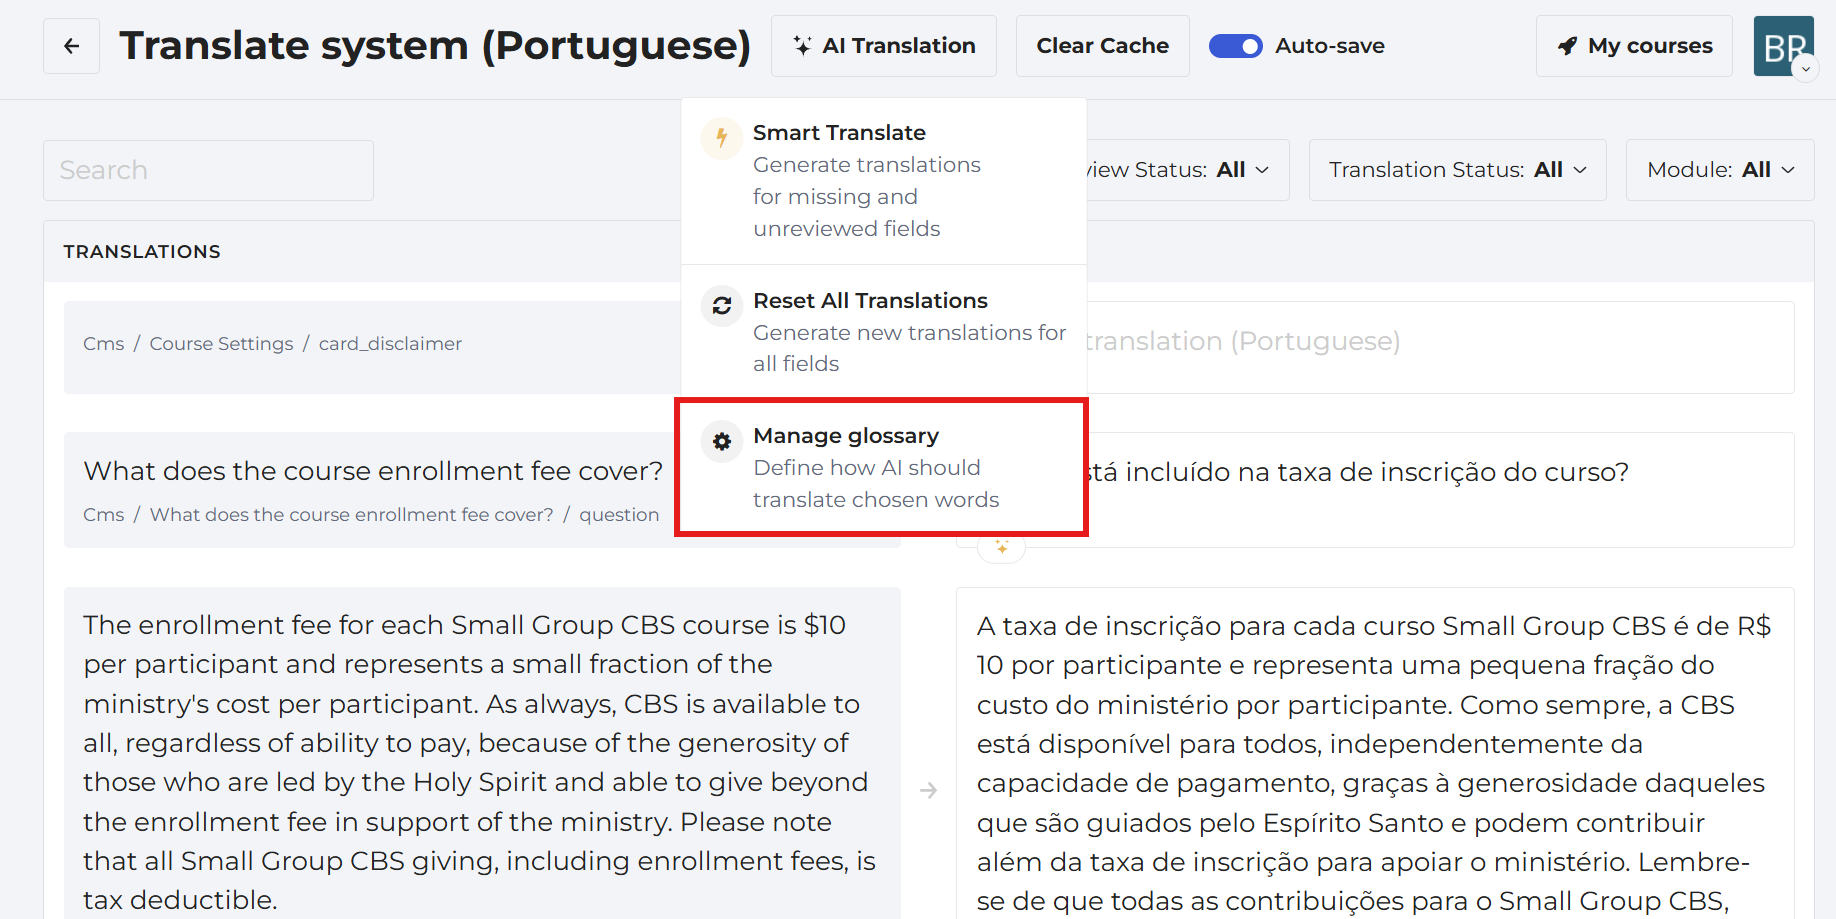
1. Click on the AI Translation button and choose the Manage Glossary box in the dropdown menu.
2. Enter the preferred translation. You can add new terms whenever it is needed.
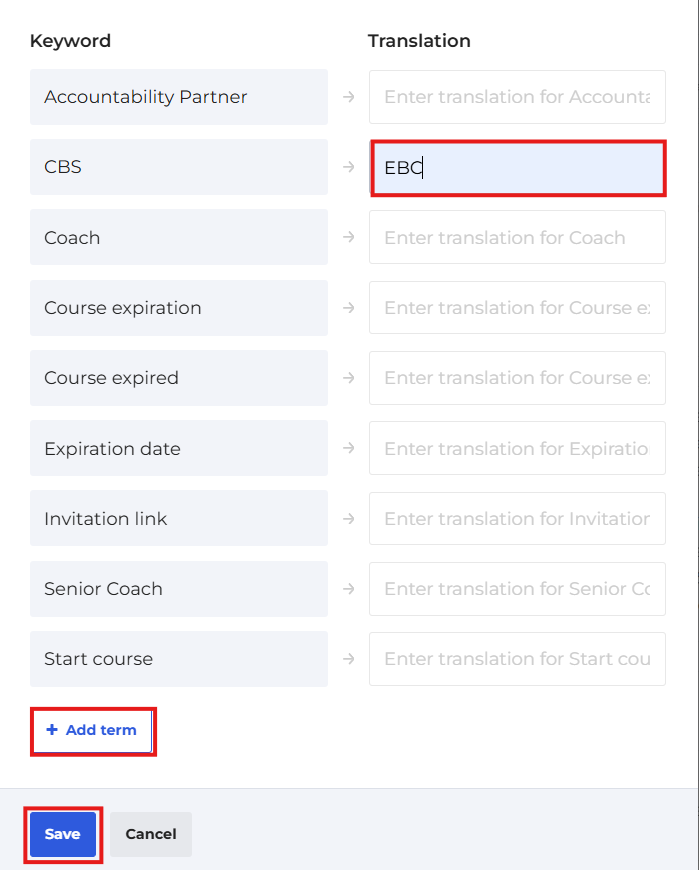 Note: Don’t forget to save your translations.
3. Once all reviews have been completed and everything is ready, notify your Superadmin so they can activate the language on the platform.
If you notice the translation for the language has not been generated yet, your Superadmin may want you to generate the initial AI translation.
To Generate the Initial AI Translation:
1. Click the Translations option underneath the language that needs translation.
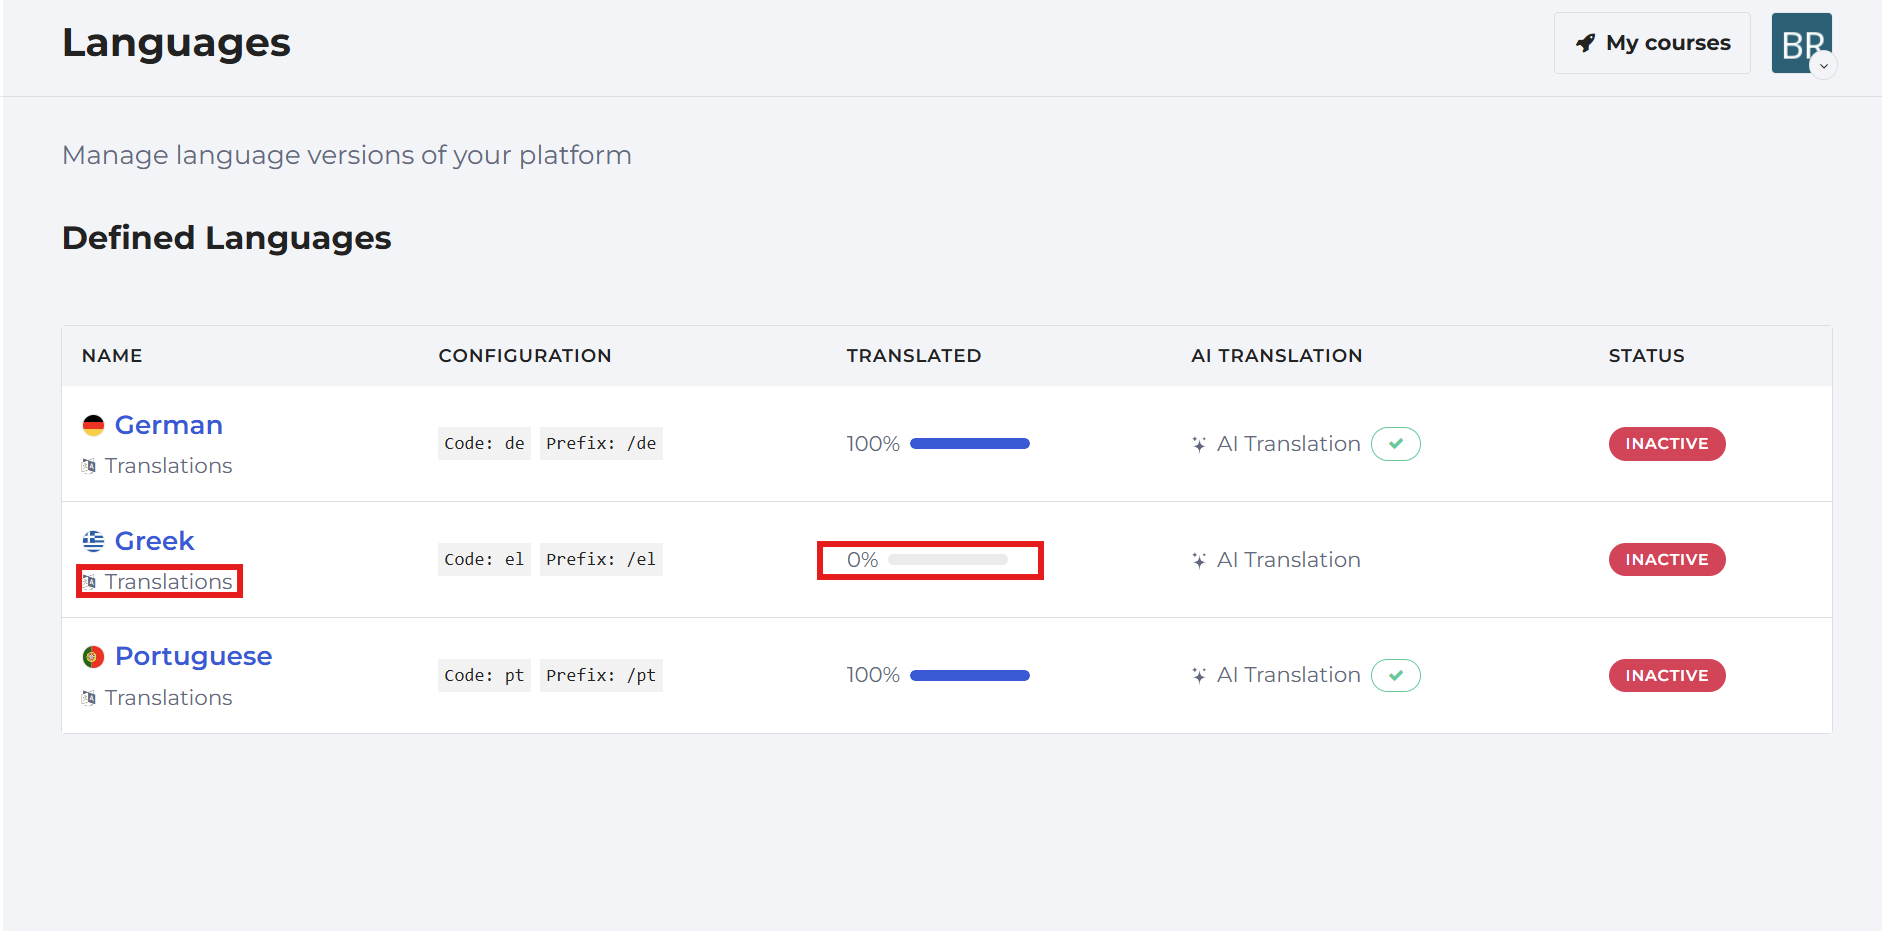
2. Click the AI Translation button in the top menu. A pop-up menu will appear with three translation options. Since this is the first time translating the language, click Smart Translation to generate the initial translations using AI.
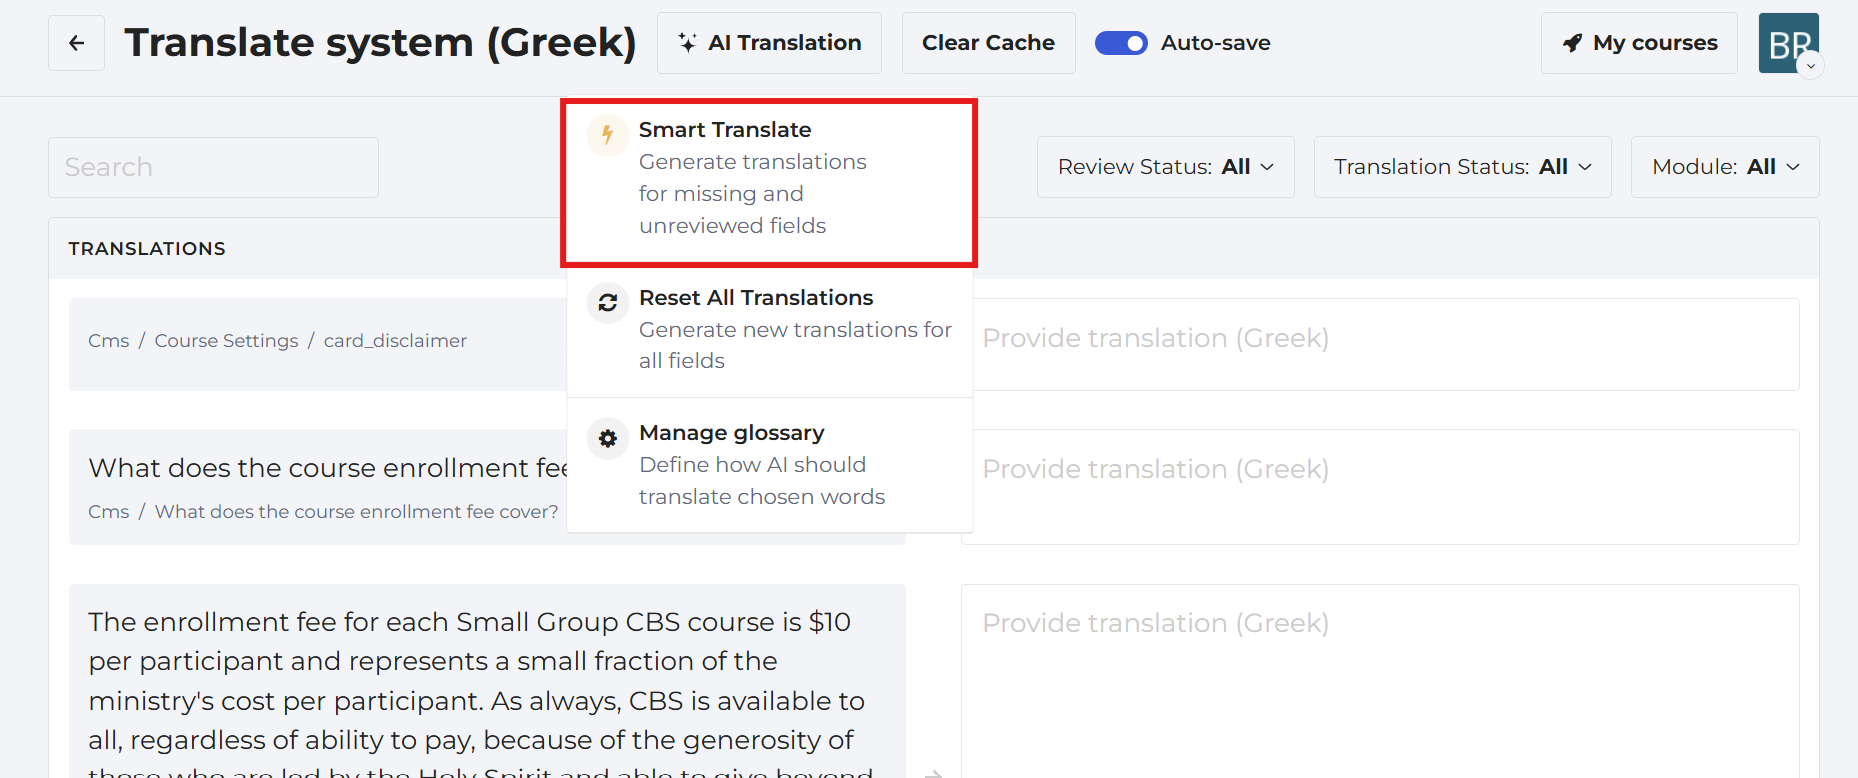
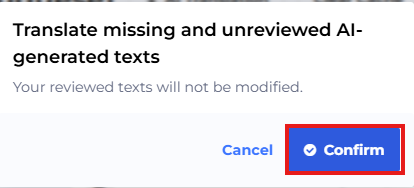
3. Click the Confirm button in the pop-up box.
4. Go back to the Language list page where you will see a processing bubble appear in the language box. It will take 10 to 20 minutes to complete the translation.
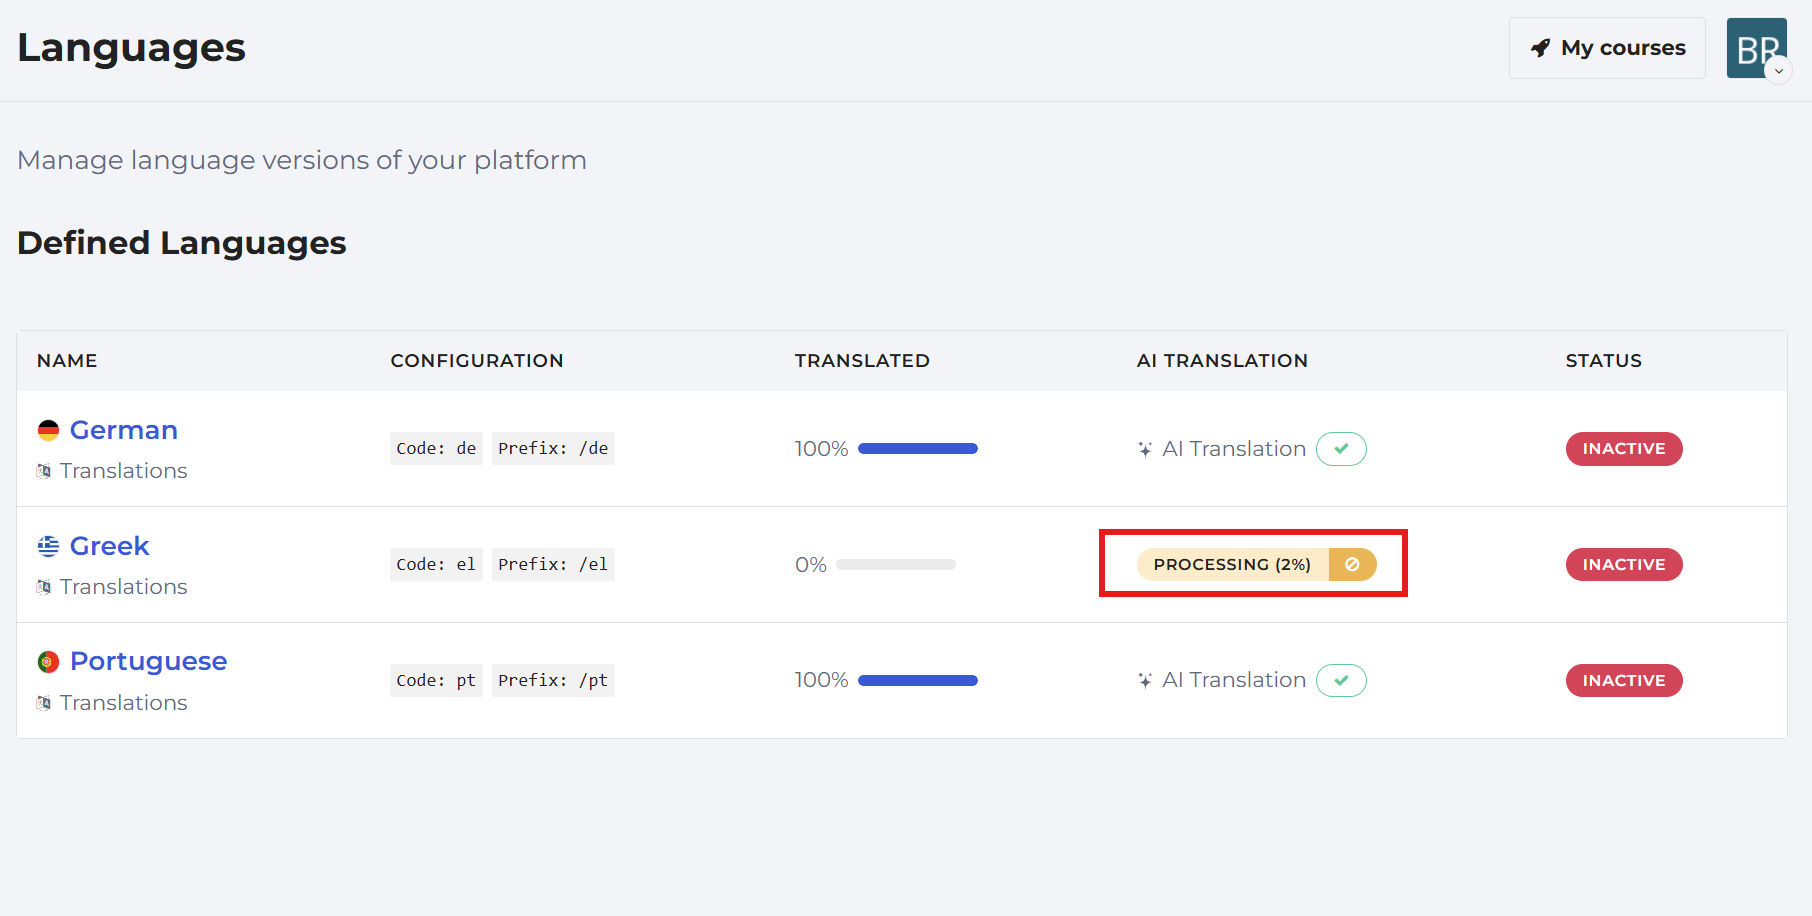
5. Once it is done processing you can begin reviewing and editing the language translations.
A Locale Manager can also view the platforms courses and make limited edits to the homepages of the courses in their assigned language.
To View and Edit Courses in an Assigned Language:
1. Click on the Course List page in the left-hand menu underneath Courses. To find the language version you want to edit, either select the Languages option underneath the course or use the drop-down list of languages at the top of the Courses page.
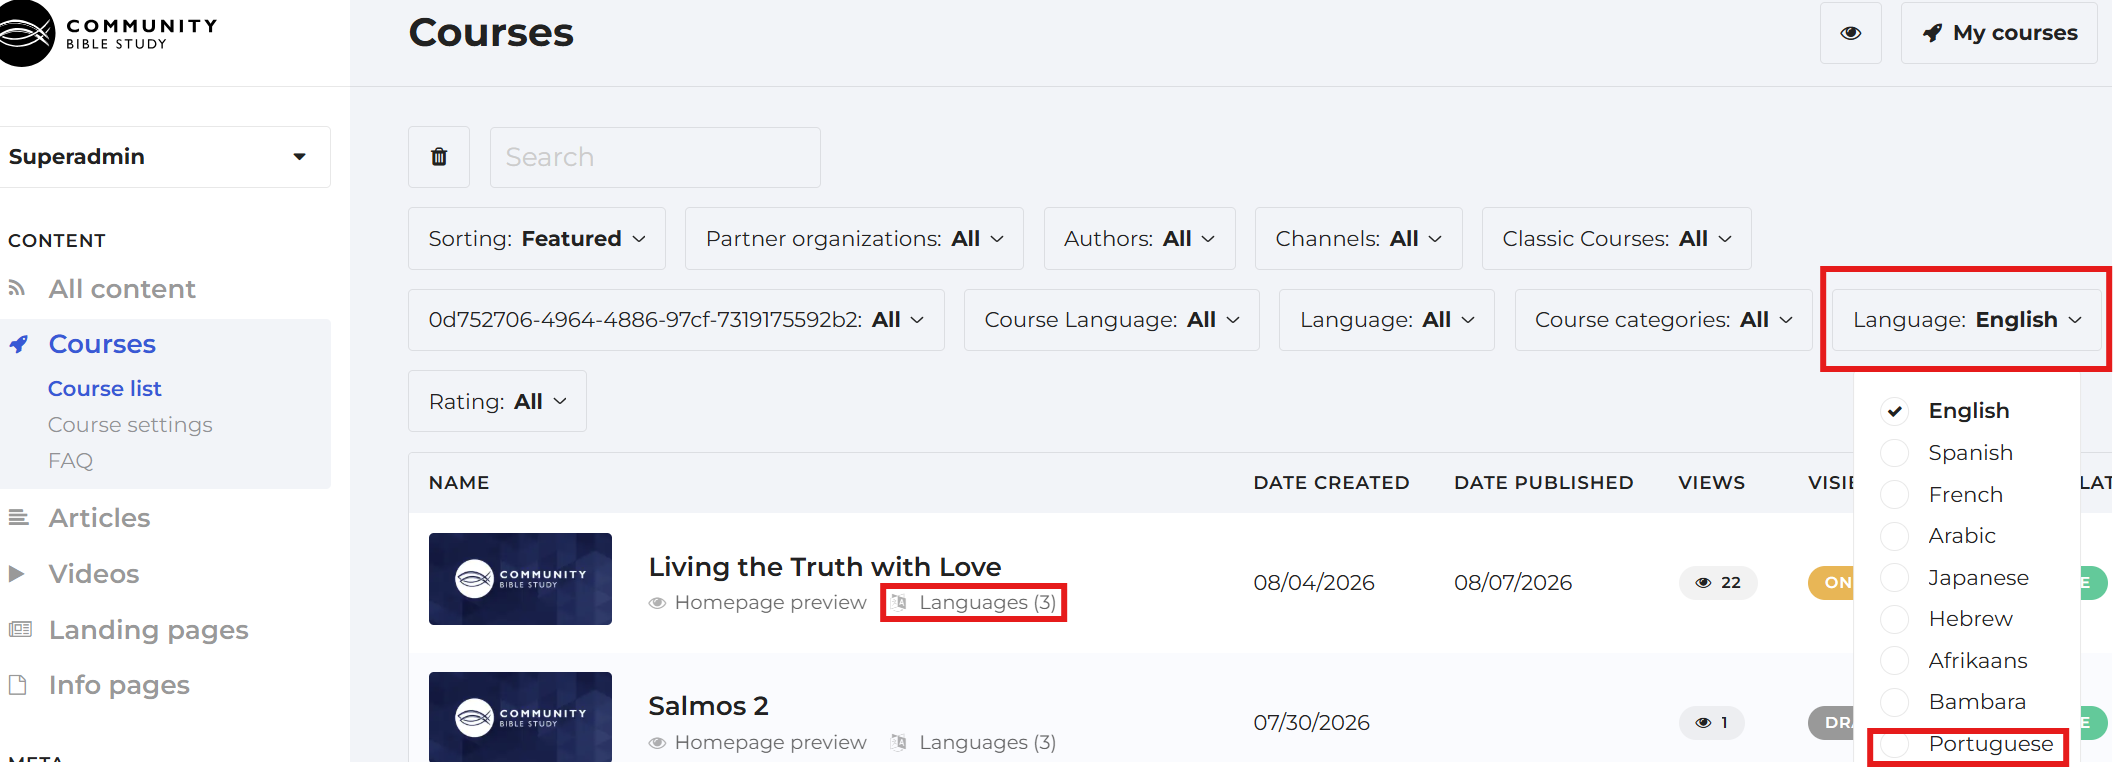
2. You will be able to select Edit for any language versions you have been assigned.